If you haven’t downloaded the files yet, please log in to your account and download them to your phone using Chrome or Safari browser.
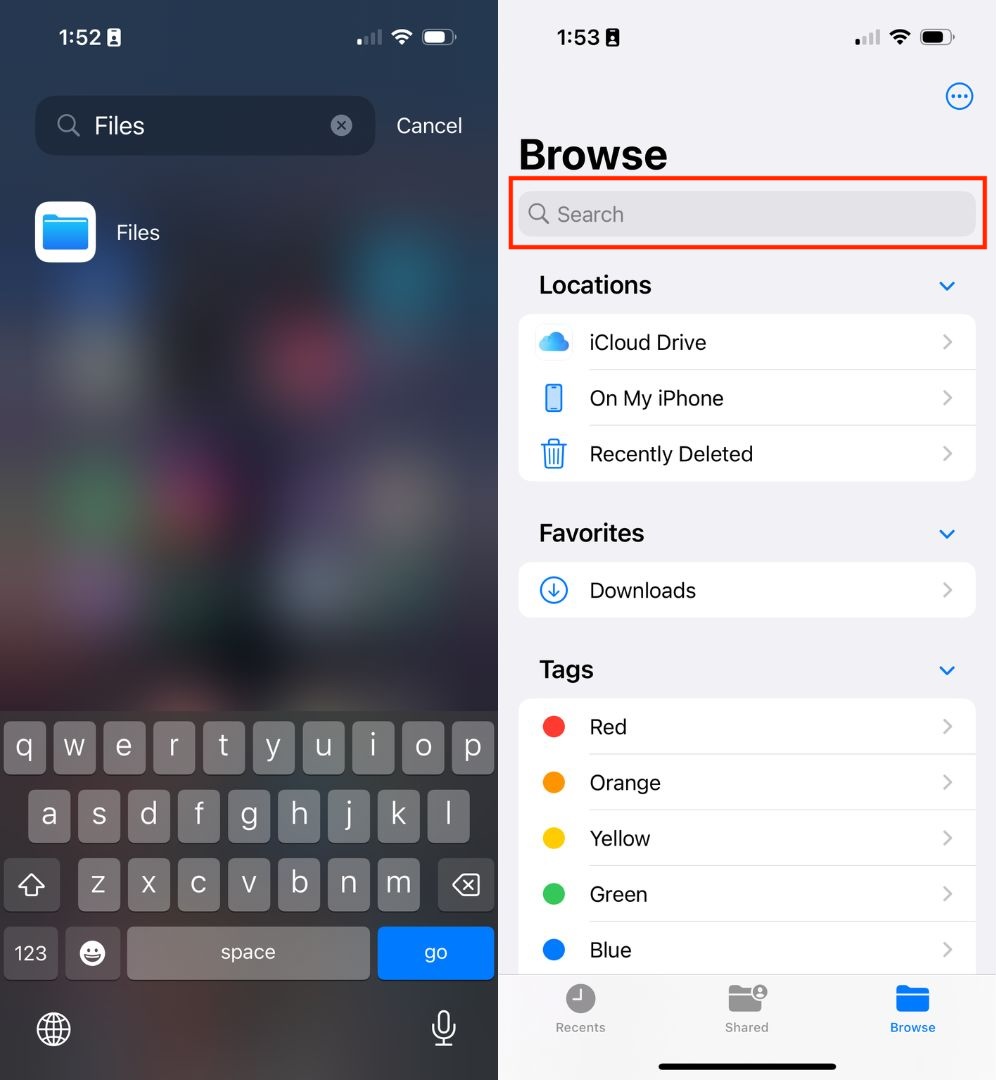
The downloaded file will be stored in the “Files” app. If you don’t have this app, please download it from the App Store.
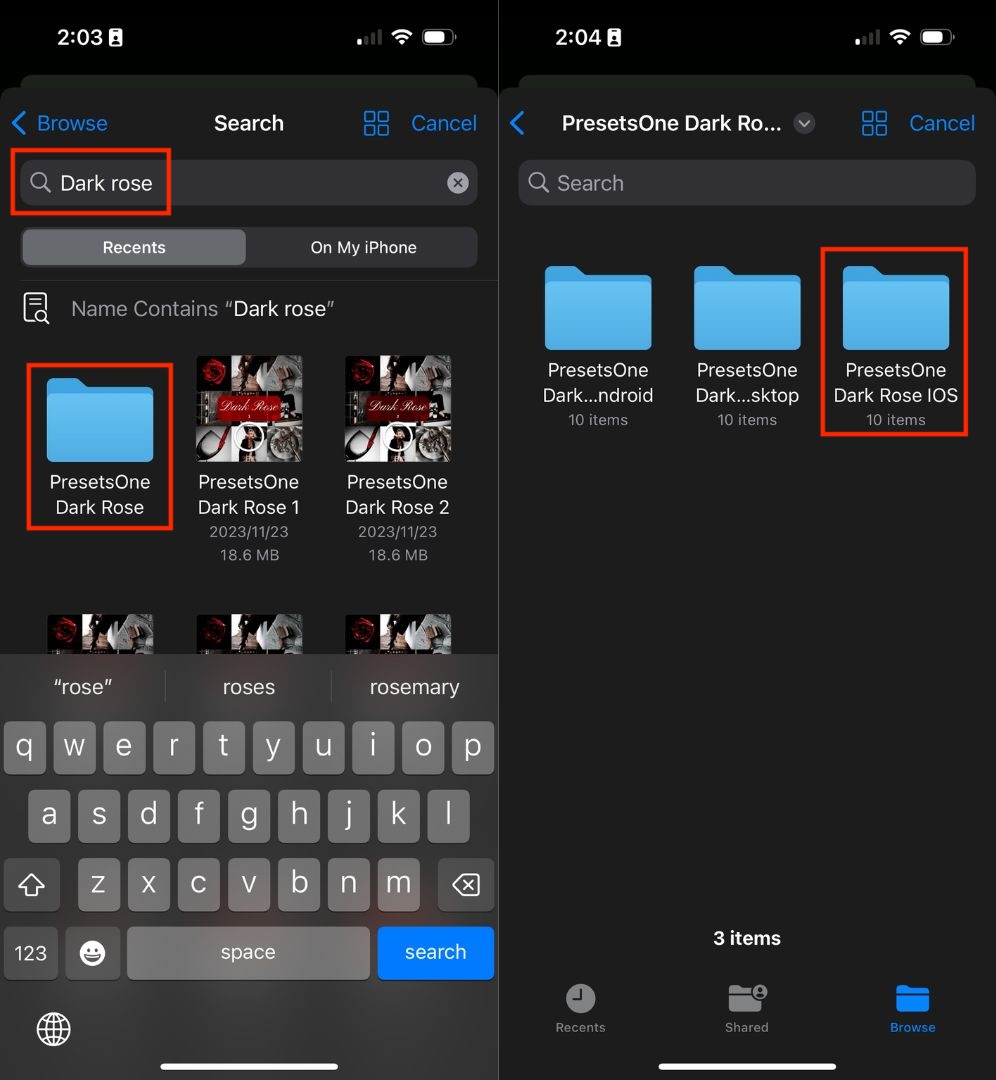
Open “Files” and search for the downloaded file.
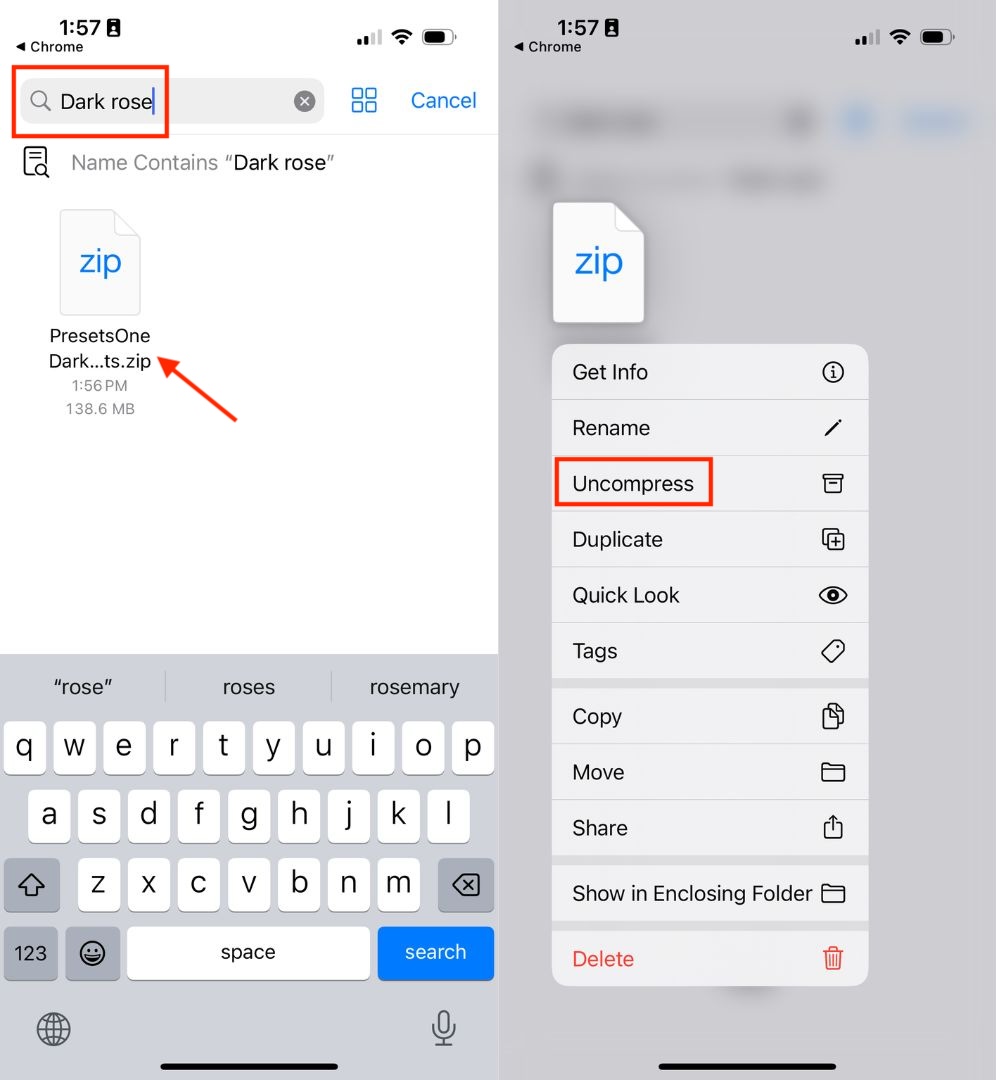
The example used here is “Black Rose”. Find the file, long-press the file, and press “Uncompress”.
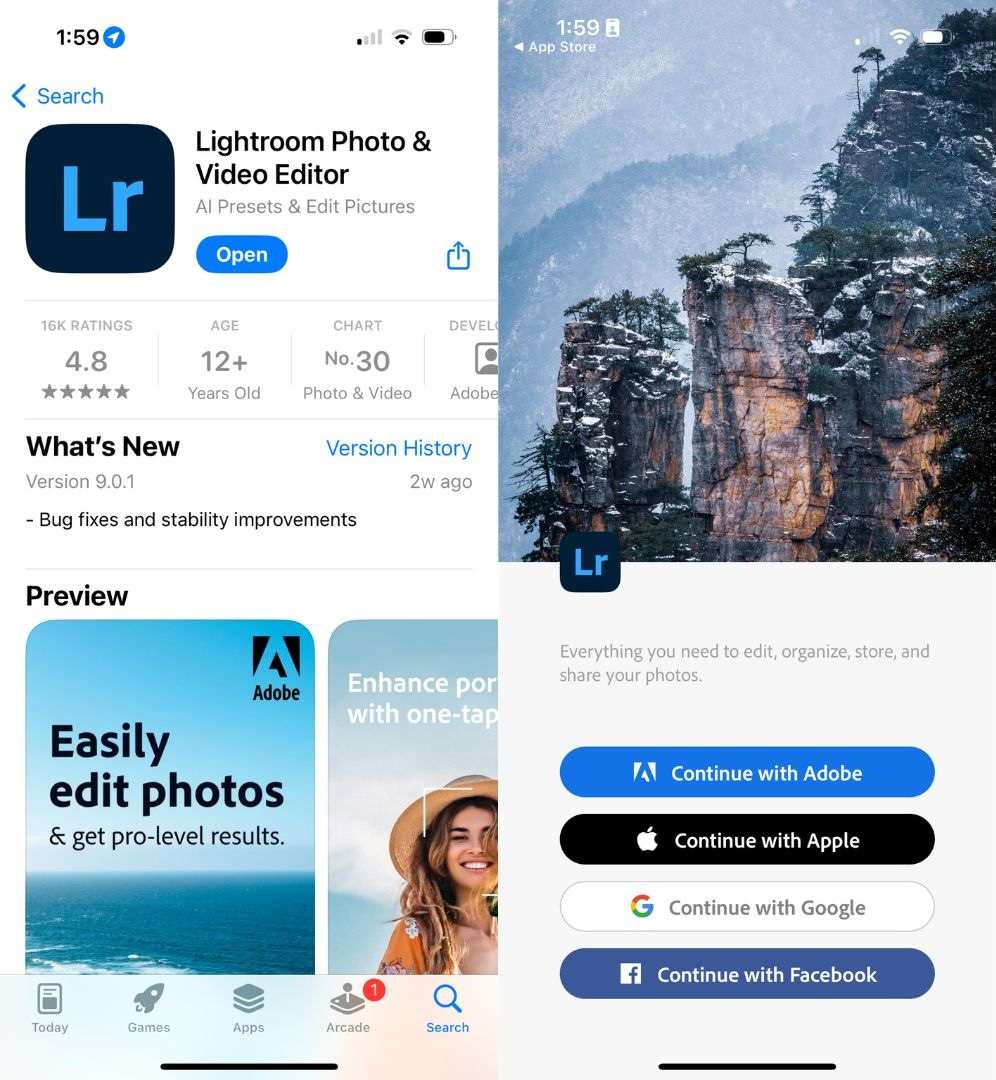
If you haven’t installed Adobe Lightroom, download it from the App Store. You can log in with any account; it doesn’t need to be the same as your PresetsOne account.
You don’t need a premium Lightroom subscription, the free version is fully compatible with our presets.
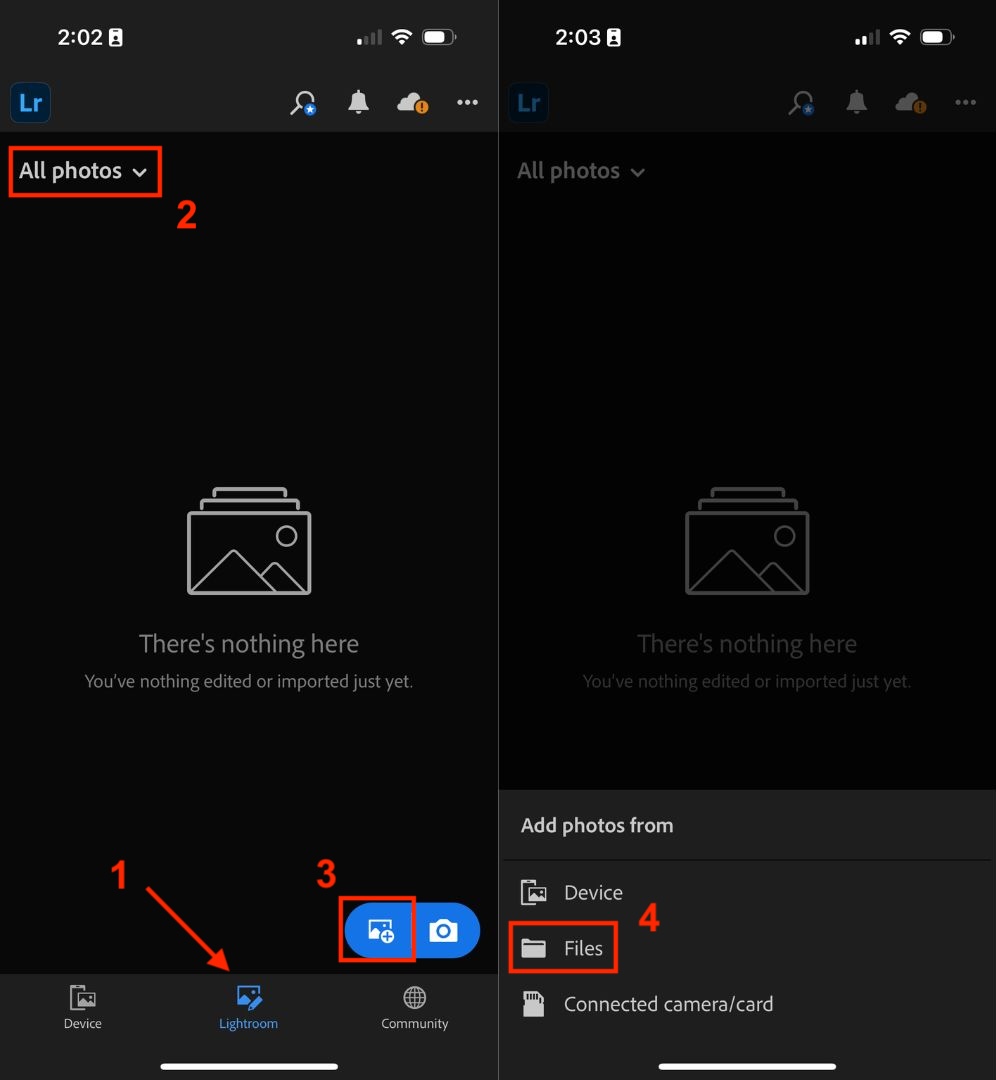
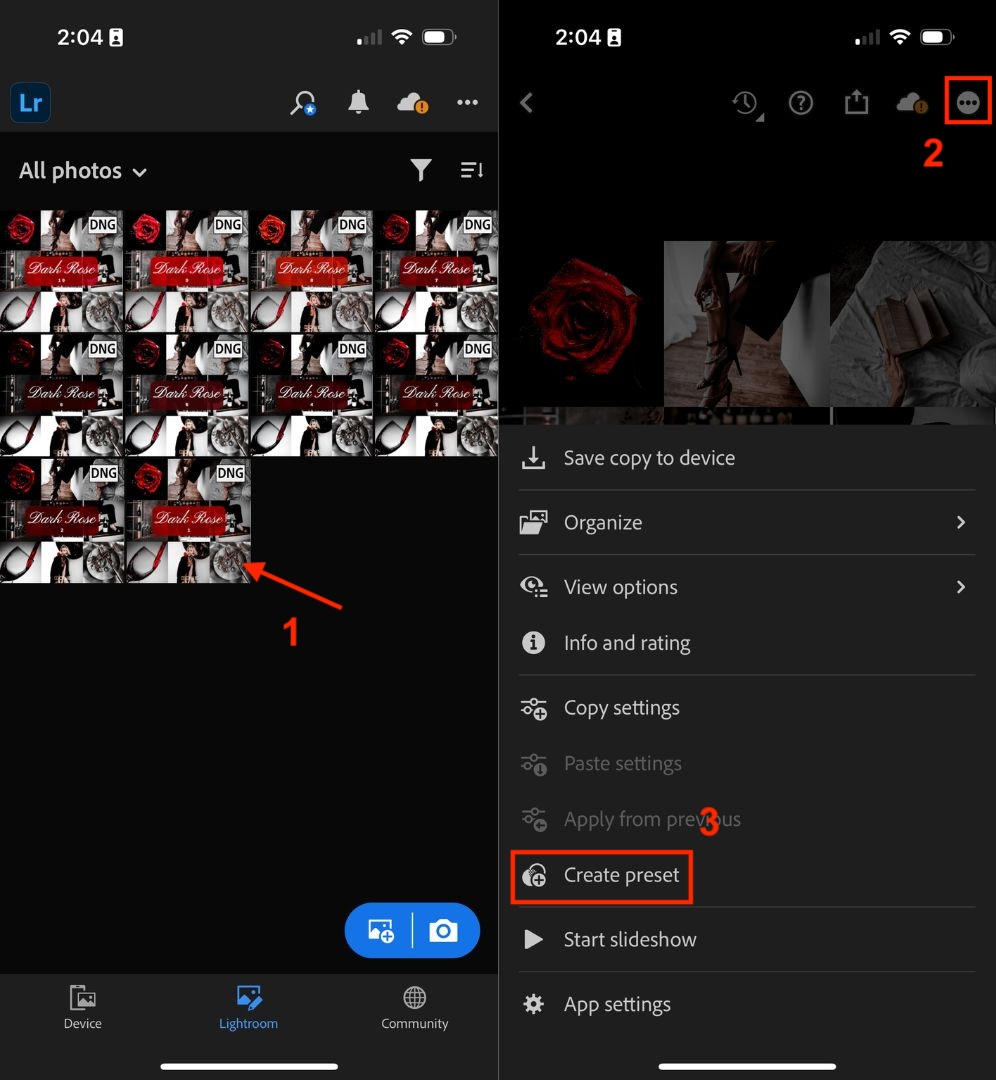
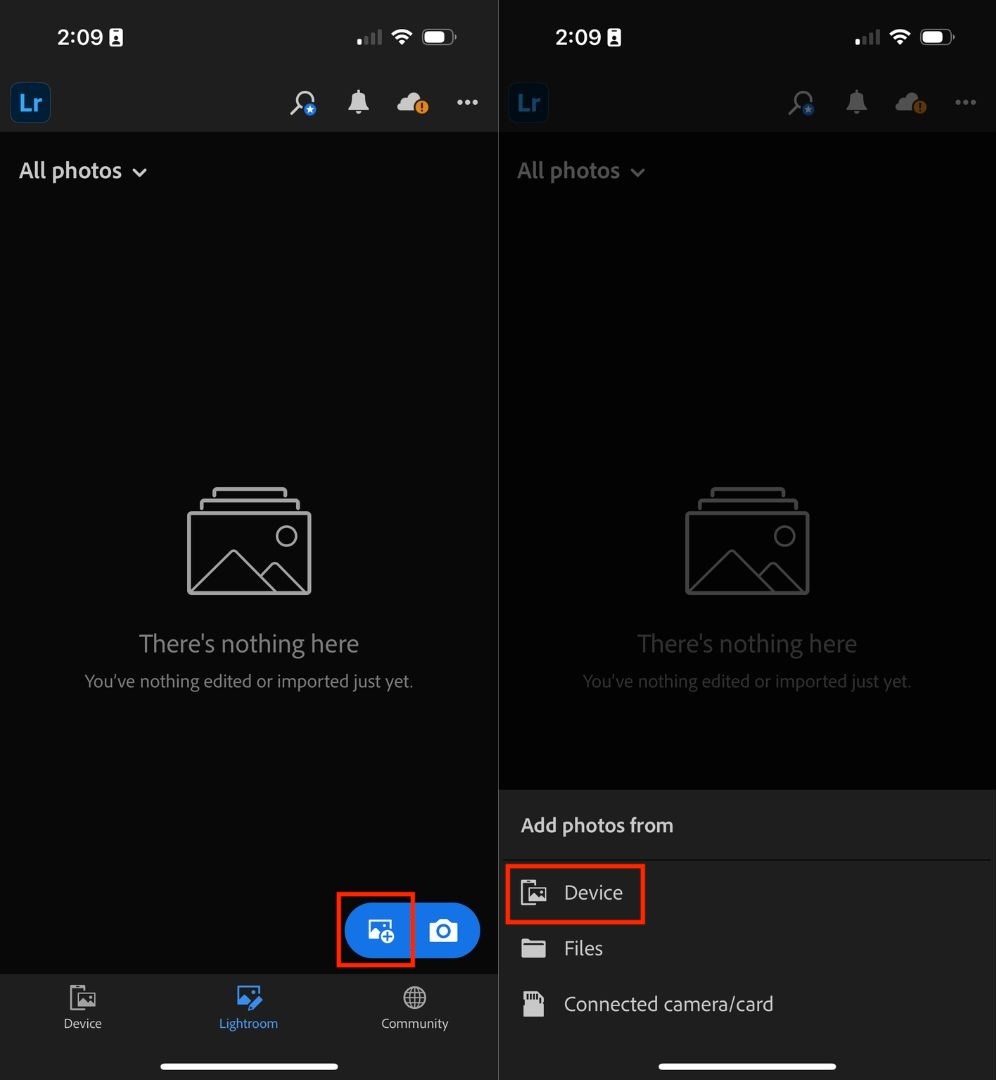
In Lightroom, click the “Lightroom” icon at the bottom, choose “All Photos”, and add photos from “Files”.
Search for the preset’s name, find the unzipped folder, and choose the iOS folder within it.
Select a file, click “Select All” in the bottom left corner, and then “Open”.
Each file has a number (normally number 1 will be the last 1).
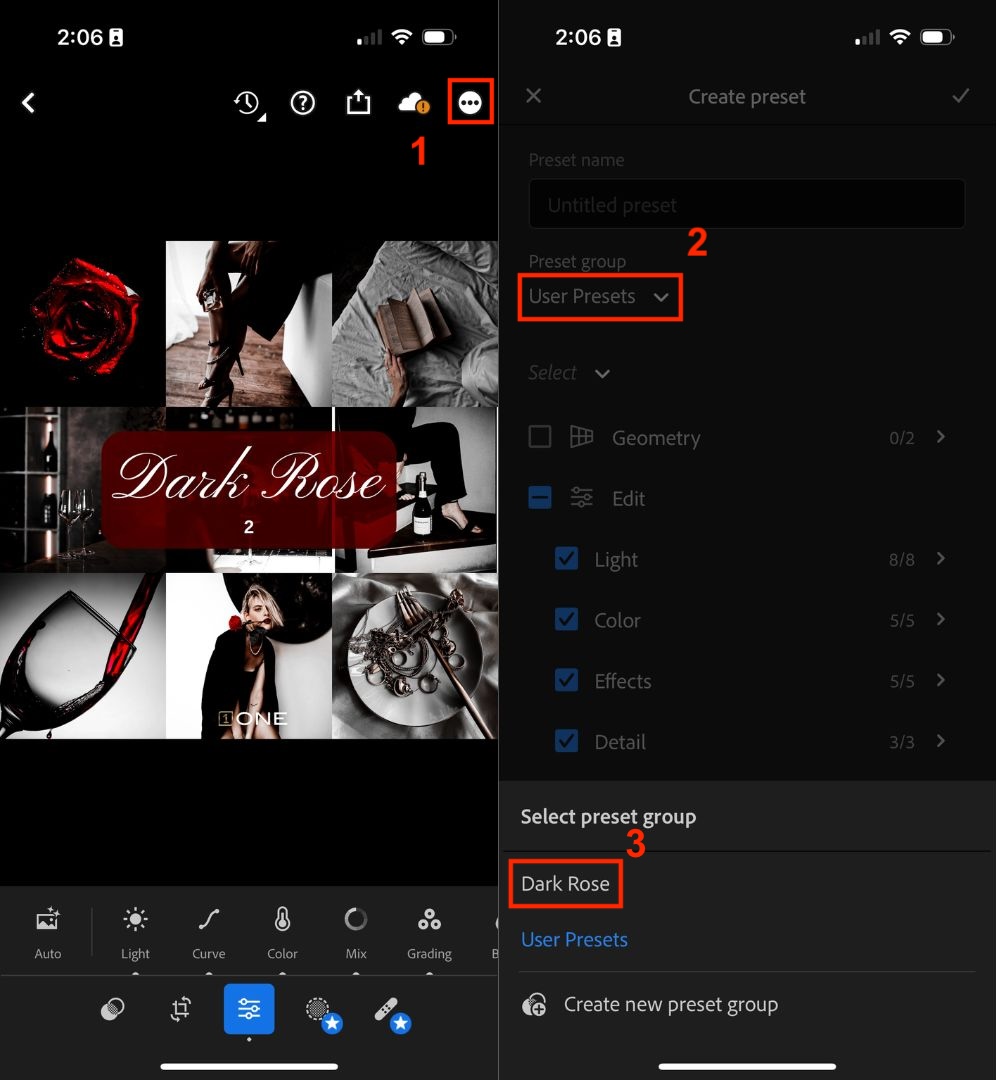
Start with number 1, open it, click the three dots in the top right corner, and select “Create Preset”.
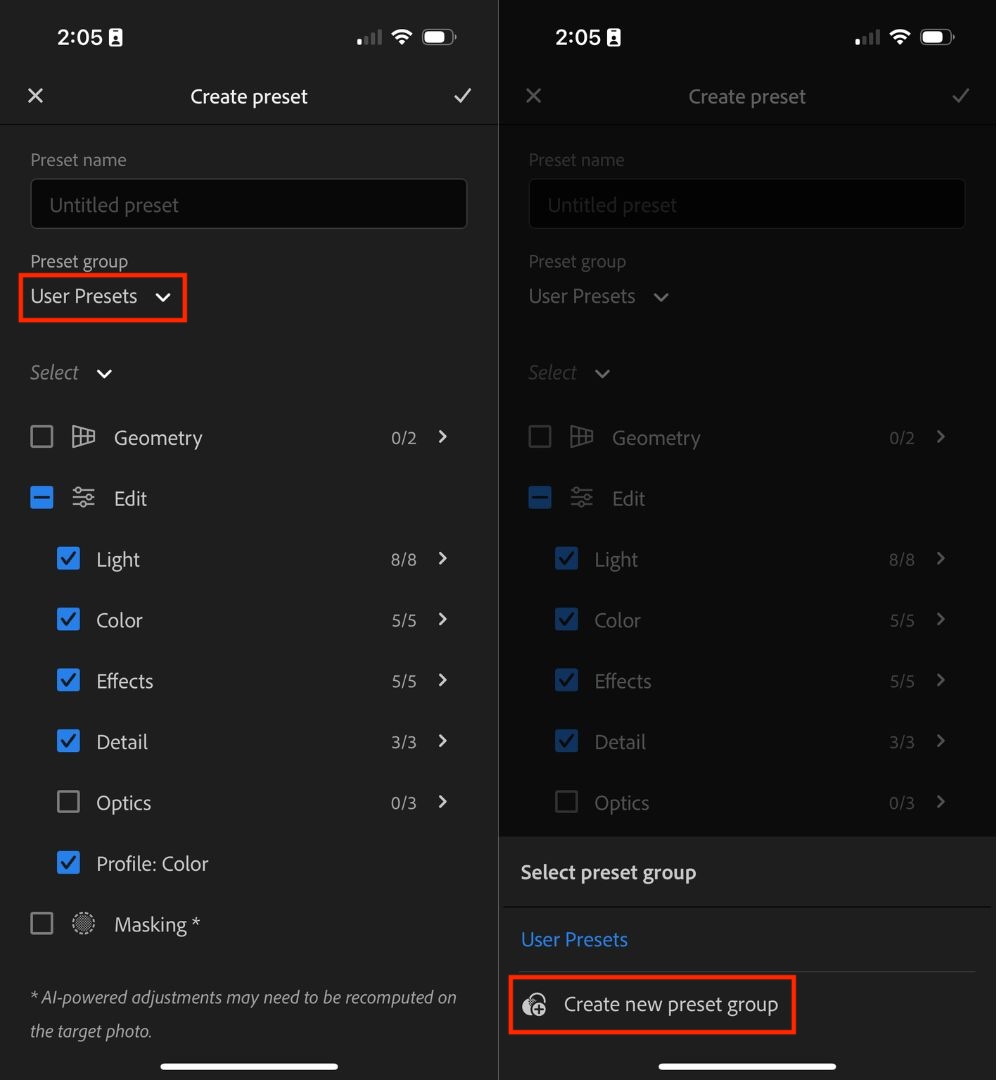
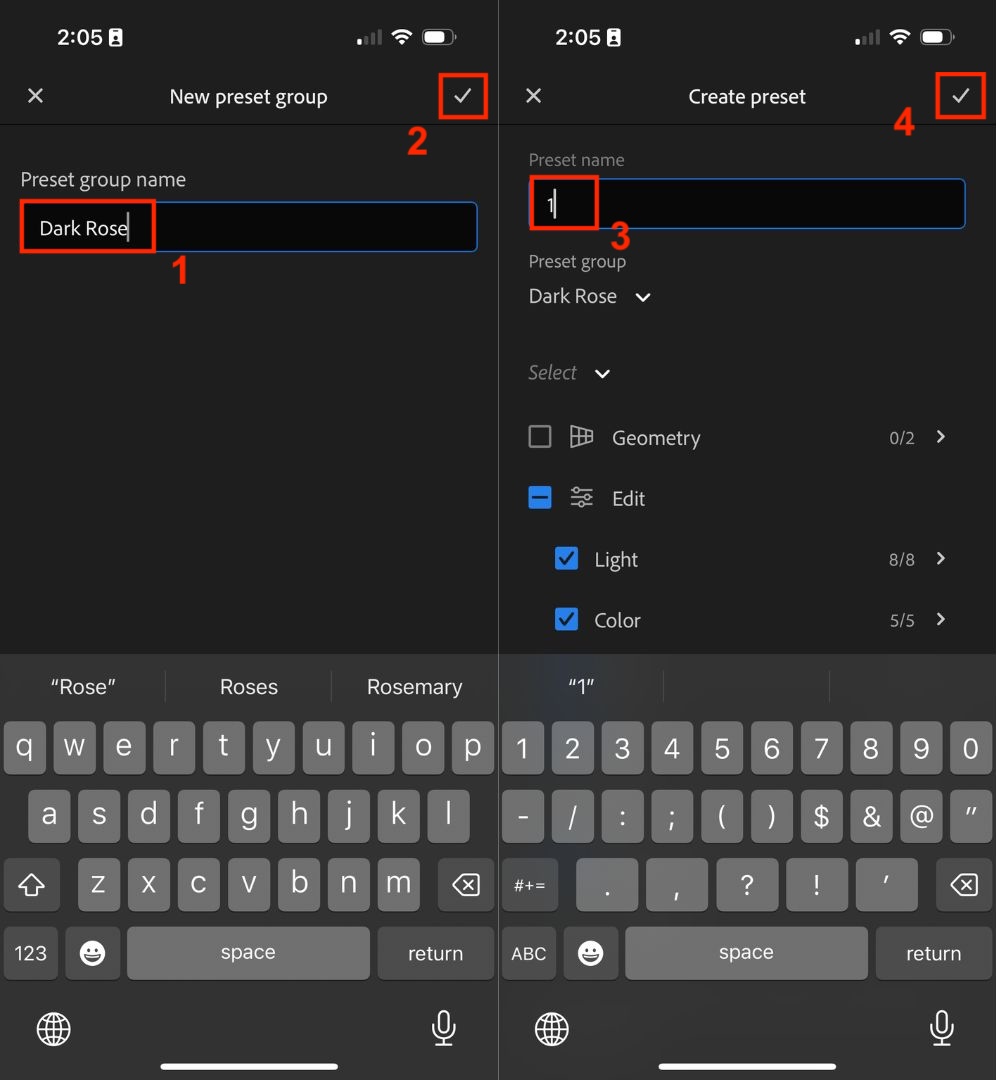
Select “User Presets” and then “Create new preset group”.
Preset group name can be the name of the preset. Preset name will be the number of the file.
When it’s done, slide to the right and you should see the second file.
Click the three dots in the top right and create preset like last time. Select the preset group you just created, don’t need to create a new one.
The preset name will be 2 this time. Repeat these steps for all 10 files.
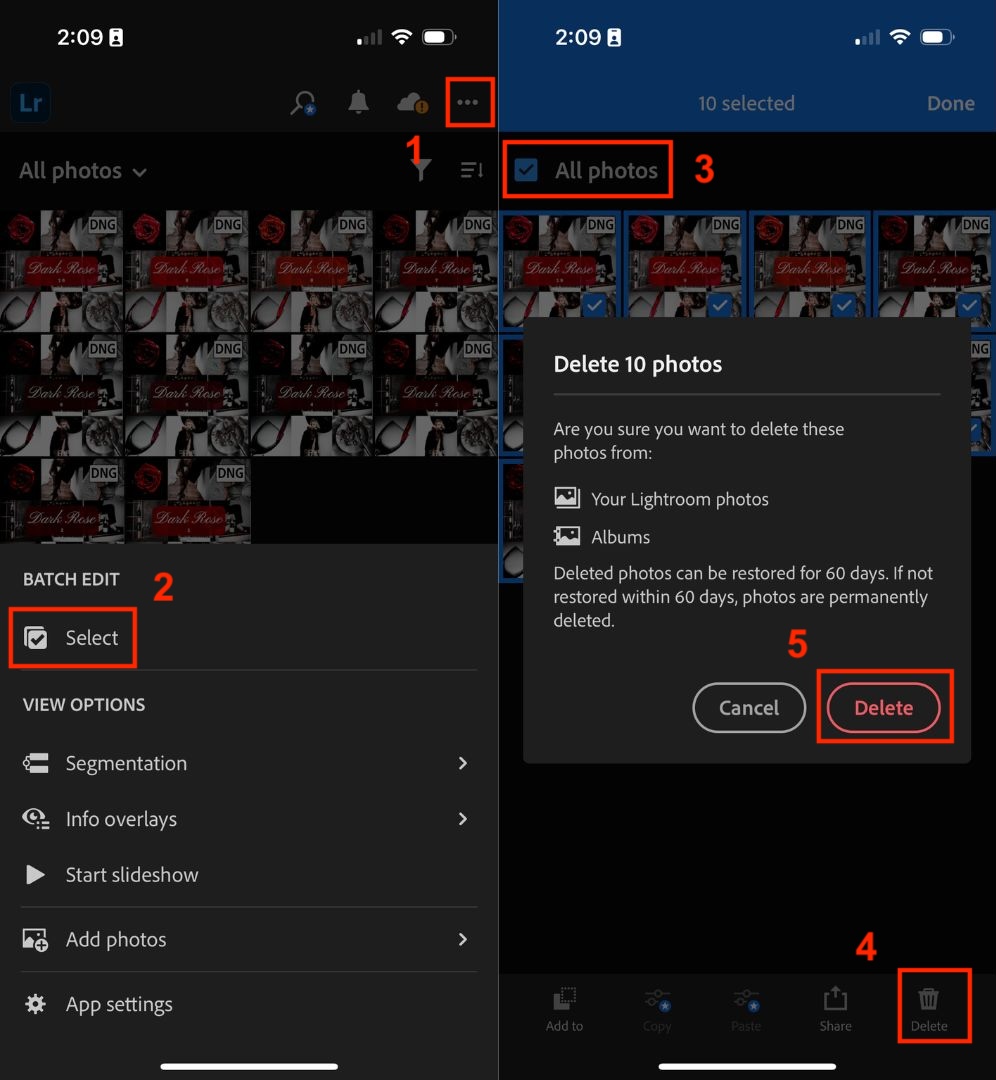
When it’s all done, go back and you can delete all files.
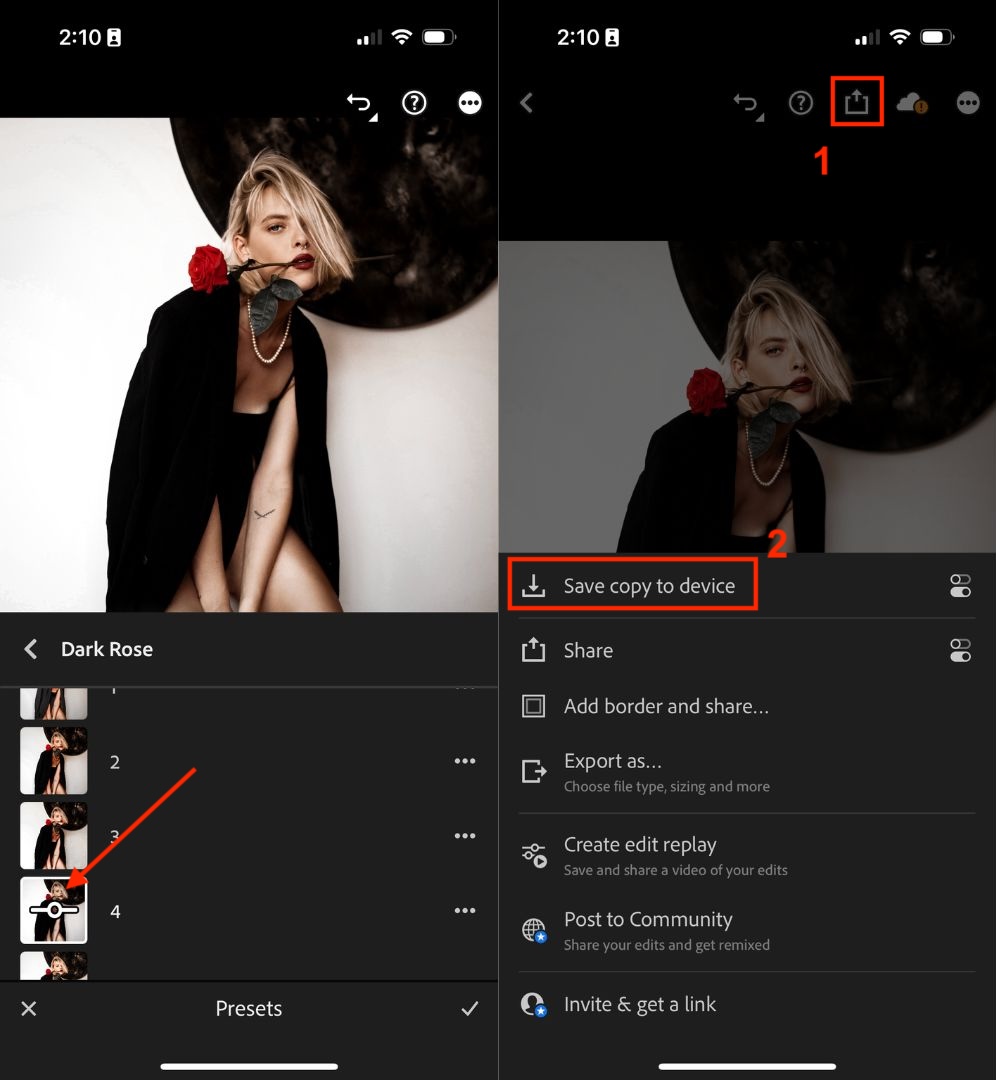
To apply a preset, add a photo into Lightroom from device.
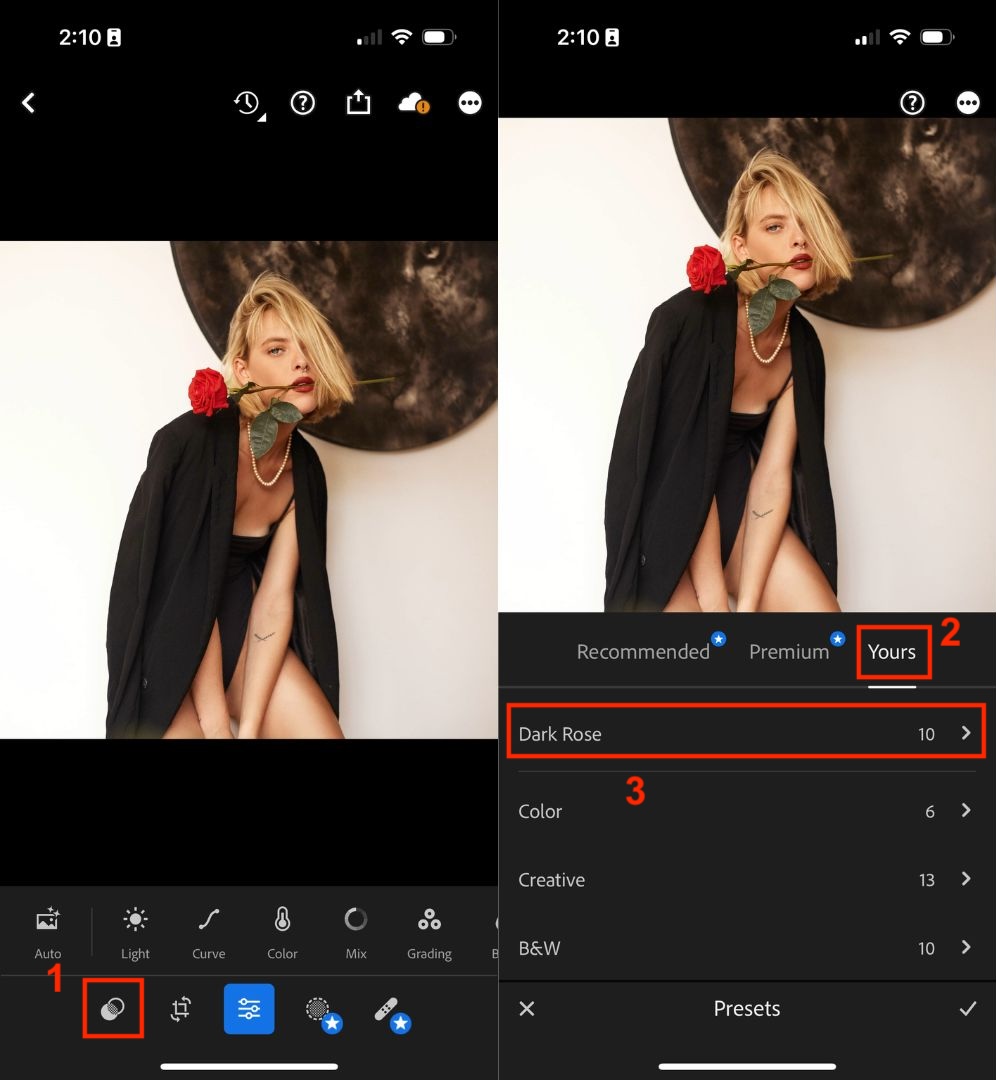
Open the photo, click the “Preset” icon, and you’ll find the newly created presets under “Yours”.
Click on the filter to apply it, and you can adjust the strength of the filter by moving the middle slider.
To save the photo, click on the share icon in the top right corner and select “Save copy to device”.